Thursday, 29 July 2010

An Ending (for now at least)


The time has come to bid a woeful farewell to the poor Captain Mo. But his story is only just beginning.


Legends tell of seven dastardly beasts of the ocean depths that clawed Mo's galleon to watery ruin. Each foe more terrifying than the last, the list of seven was rumoured to be:

  1. The steam driven mechanical sea demon; Cranky
  2. The fearsome cannibal sea-monkey (the last of his kind - he dined upon the rest. Now he's hungry.)
  3. The forlorn penguin-squid
  4. The lantern fish
  5. Phantom Parrot
  6. The hat-wearing urchin
  7. The oarfish of doom
Will Captain Mo's relentless determination ever lead him to new seas? Our thoughts are with you Mo.

Reflections


In the Masters Proposal for this project, I stated that I wanted to create an outcome combining a "juxtaposition of old techniques and new technologies, cross-discipline design and whimsical storytelling." (Holwill, C., 14-04-2010) I believe I have managed to accomplish this in the film I have produced.

I enjoyed creating a film inspired by textiles and drawings with a playful narrative, and subsequently producing merchandise and textiles inspired by this film. I used old techniques, such as drawings and screen printing, combined with modern technologies such as laser cutting and computer-aided design. I also mixed disciplines, by introducing footage of textiles and scans of screen prints into an animated environment using Adobe After Effects, and then extracted images from this animation and applied them to t-shirts and stationery. I believe this is an innovative approach to the potential applications that these disciplines can offer.

This project has the potential for future development. Originally I had hoped to experiment with a wider variety of techniques which would exploit the capabilities of textiles and introduce them into an animated environment. My project became more focused, and I decided to restrict my research to only one method - creating and compositing moving imagery using Adobe After Effects. This enabled me to gain "a more comprehensive mastery" in my selected technique. (Holwill, C., 14-04-2010) Adobe After Effects allowed me to build upon my existing experience in Photoshop, and create a 'collage' of imagery and real footage, which could be animated and manipulated, thus creating the desired aesthetic. This layering of drawings, printed textiles, laser cutting scans and footage of real fabric moving and rippling related directly to the juxtaposition of techniques and ideas that I had intended to produce from the outset. Although the final film was produced using a computer-based programme, the layering effect had similarities to screen printing and collage. Layers were built up, added to and embellished, creating the final film.

As stated in my Masters Proposal, the areas of innovation I hoped to explore in my project were:

· Combining traditional techniques with modern technology
· Combining animation and textile disciplines." (Holwill, C., 14-04-2010)

On reflection, I believe both of these aims have been achieved.

The merchandise range of t-shirts and stationery I designed is an effective continuation of the narrative, expressing it in a new and perhaps more commercial context.

For future work, I would continue telling Captain Mo's story, and the additional fearsome foes he encounters. Each of these monsters would be expressed in a new technique or aesthetic. I would also continue to develop my range of merchandise.

Wednesday, 28 July 2010

Captain Mo's Memorabilia


Merchandise is progressing nicely, with one more t-shirt in the collection:

T-shirt Front
I would also like to make a ship necklace which will swing down across the waves, creating Captain Mo's bumpy voyage.

T-shirt back

The Mini-cards and postcards from Moo also arrived this week:

Mini-cards

Postcards

I have started making badges with the same images, and ordered some exciting paper from Crafty Computer Paper. All of their paper is printer-friendly, so I ordered double-sided cotton, shrink paper, repositional sticker fabric and magnetic paper. I can use all of these sheets in my inkjet printer.
The shrink-wrap paper turns into a hard, plastic-like object after it has been put into the oven. The images printed onto the paper must be cut out and placed on a baking tray, and left in the oven for 2minutes. After this time, the tray is removed and the images will have shrunk to approximately half of their original size, and hardened into a thicker, more durable state. I have experimented with this and think they will make effective brooches, pendants and zipper pulls.
I have printed my images onto the double-sided cotton to sew up into purses, and have yet to try the magnetic paper. For the repositional fabric stickers, I would like to print a seascape of various waves and a ship, lure and monster. These can then be played with and rearranged to tell the story of Captain Mo.

The merchandise I am creating is intended to present a selection of ideas for playful items which continue to tell the tale illustrated in the animated film. Although my competitors such as Disney and Pixar are able to use only a silhouette of a character to create a recognisable image, my film merchandise is still in its infancy and plays a different role. My t-shirts are more crafted and expressive than the placement of a single character in the centre. A better comparison would be to relate my merchandise to that of The Moomins, as shown earlier in the blog. ("Captain Mo Likes..." posted on Wednesday 30th June 2010.) These bags are more playful and illustrative, and capture the inventive, wholesome character I hope to achieve in my own work. My t-shirts aim to be an extension of the animated film, but at the same time aim to raise awareness about it and provoke a curious interest into the origin of the images.


Sunday, 25 July 2010

The Final Film... With Sound


At last... the film is complete with sound!! Proudly presenting the epic of Captain Mo:


The soundtrack is a combination of my own recordings from around the university, and some drones and environment tracks from the Edinburgh College of Art sound library.
My own sound effects were mostly recorded from around the print studio - screens being loaded into the drying ovens, paint rollers, thumping squeegees on the tables, and the legendary creaking door into the print room (this provided the sound for Cranky reeling in defeat.) These sounds were manipulated using Audacity. This was a programme I had no prior experience with, but I was able to learn the basics quickly and use it for the required effects.

The tracks taken from the ECA sound effects library were as follows:

"Desolation" from Drama Moods And Drones.
"Drama Drone 9" from Drama Moods And Drones.
"Evil Influence" from Drama Moods & Atmospheres.

"Out Of Our Hands 2" from Drama Moods & Atmospheres.

"Red Dragon" from Surreal Percussion.

"Blast Furnace 1" from Environments.

"Landmass" from Dark Drones.

"A Strange Place" from Dark Drones.

"Anguish" from Dark Drones.

"Machine Room" from Drones.


These tracks were adjusted to suit the film and my own sound effects were built on top. The soundtrack was assembled using Garage Band. Ideally, I would have recorded the whole soundtrack myself, but after considering the time limitations this was an excellent alternative.


Friday, 23 July 2010

Thursday, 22 July 2010

T-shirts by Mo, Episode 2


Another two t-shirt designs were created today. I'm really enjoying the process of building up the layers in a similar way to building the film in Adobe After Effects. Areas are masked off so I can apply new layers, such as the waves being masked so I can print Cranky over the top. It's interesting to notice the similarities between the two disciplines.

.
First, the waves are printed in dark blue.

These waves are then masked off and Cranky's silhouette is printed on top.

Cranky's details are printed on top of the silhouette, while the waves are still masked.

The mask is removed, revealing Cranky bobbing on the seascape. An adhesive layer of waves is the printed, ready for the copper foil to be applied.

The second design was much simpler, with the wave pattern printed in black followed by the adhesive for the copper foil.

Original printed fabrics were used as base textures for the animated film, such as Cranky's surface layer, and the imagery in the film is now being printed onto fabrics. These t-shirts are another example of cross-discipline design within my project

Wednesday, 21 July 2010

T-shirts by Mo


Today I started printing some t-shirts using imagery from the film. I kept the same colour palette, and decided to try some foil effects to give a Steampunk inspired twist.

This is the t-shirt after the first print. I applied two colours using the same silk screen.

Next, I applied a black pigment to the waves at the bottom, and then printed the whole outline of the design with an adhesive for foil.

I finally ironed on some gold foil. I wanted to make the image look distressed and weatherworn, so I only used foil over some of the design and kept it very faint elsewhere.

This is the second t-shirt design, featuring Cranky lurking at the bottom of the sea.


While I was making the t-shirts, I took some photographs of my screens being washed and the colours left on the table after printing. Some beautiful textures again!


Sunday, 18 July 2010

Made by Mo


Here are a few examples of merchandise I have been working on this weekend.
First, I decided to order some business cards from Moo, and while I was there I also ordered some postcards and stickerbooks.

Moo Mini-cards

Moo Stickers

I then ordered some postcards from Vistaprint:

Postcard Front

Postcard Back

I also applied the same images to some other products, including sticky notes:
Vistaprint Sticky Notes

And a mousemat:
Vistaprint Mousemat

The last item I would like to order is a book from Blurb. This website allows you to upload text and images and build them into your own book, which I think would be a brilliant way to show my project from start to finish. Unfortunately the book will take three weeks to arrive, so I will need to finish it and order it this week. This means that I will be unable to include images of the merchandise I am producing, but I think the focus of the book should be on the production and completion of the animated film and the techniques used to create it, such as laser cutting. I will also be able to include all of the ideas, concept artwork, drawings, sampling, storyboarding, computer-based design work and screenshots from the final sequence.

The final pieces of merchandise I want to create are t-shirts, badges, soft toys, folding fans and printed textiles for bags etc.
The pieces I am currently working on are designs for silk-screens to begin printing. Here I have used the waves drawing featured in the animated film, and have used Photoshop to extract part of the image and build it into a repeat design:


I left the tops of the waves so that I would be able to incorporate other elements into the design, such as Captain Mo's ship bobbing on the surface, and would also have the option to create an all-over print.

I also started working on a design for a fan. I used folding fans as inspiration for Cranky's gills, so I thought creating my own design from elements of the film would be an effective extension of this inspiration.

Friday, 16 July 2010

Building Mo's World


The final film was built up gradually in several stages. The poster opening was added first, followed by the individual cloud animations. The sequence showing Mo's descent into the ocean was made separately and the ship was added in the final composition, and Cranky was also animated separately. This helped to simplify the final composition, although at its final stage it still consisted of 30 files and 70 layers, including lights, mask layers and duplicate files. This made the final project very complicated, but also made it easier to control the interaction between the elements. This also means that it will be possible to make small alterations if necessary.


A Breakdown of the Final Film

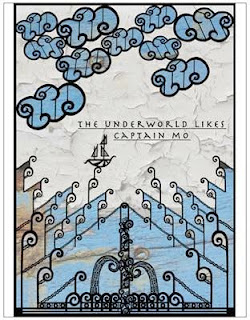
To start, the sequence opens with the poster animation shown in a previous blog entry. The background was taken from a photograph of a weatherworn painted door at Cove beach.


I animated this image scrolling up as the poster moves down, and then rotated it clockwise into position for Captain Mo setting sail. I used another image of stripped blue paint and used Photoshop to remove the harsh edge, and overlapped several of the images together to create a longer background to scroll along.


The sea scape was made up of 3 wave sequences, animated in the same way as described in a previous post (Wednesday 14th July). Here is a clip from the sequence used during Cranky's appearance:


For Cranky's appearance, I used an extra layer of waves to disguise his entrance. I also animated the lure in several layers, and added an extra spotlight for the lantern. I added a cannon from Mo's ship to destroy the lure, and used an extra light to create the flash of the cannon being fired. For hooking Mo's ship down into the deep, I used a mask on the top layer of Cranky revealing only his tail. When the tail releases Mo, I animated it drifting into the pile of detritus to the left and feathered the edge of the mask to create a less severe contrast with the background.

For the whole of the sequence, I had to use an ambient light in order for the whole frame to be illuminated as well as showing the spotlights being used. If the ambient light wasn't there, the spotlight would illuminate only the point it is focused on, leaving the rest of the screen in darkness.
I used the spotlight effect again for the credits, but this time I employed no other lighting in order to make use of the darkness and the focused beam of light. I inserted text layers and timed them to disappear in the darkness, allowing me to reveal the text boxes as the light passes over them.
Thursday, 15 July 2010

Sounds of the Deep


Here is the animated sequence at its final stage.


I feel I've reached a level I'm satisfied with for the purposes of the project, as I think it successfully communicates the narrative I intended and also shows a variety of the techniques I wanted to explore. In my next post, I will break down the sequence and explain how it was all put together.
I have also posted the video on Captain Mo's Facebook page, found here:


I am requesting any suggestions for how the movie can be improved. The responses I have gained so far indicate that I should:
  • Make the spotlight inside Cranky more yellow, as it is in the ocean
  • Apply a different style of transition to the frame of the poster in the opening - rather than fading, it should perhaps wipe away in a similar way to the waves.
I will take note of all responses that I receive, and if time allows at the end of the project then I will make these changes. At the moment, I need to focus on building a soundtrack, starting the merchandise inspired by the film, and finishing the written component of the project.

Due to time limitations, I hope to use some existing sound effects for my movie in addition to the ones I record myself. Ideally, I would have recorded the entire soundtrack myself but I think I would be unable to do this and edit them together in the time remaining for the project. I also researched using music, and in particular a track called "Sea Within a Sea" by The Horrors. I found an application form on the record label's website asking permission to use their music for a student project, but the form indicated that it could take several months to get a definite response or confirmation. I found the application here:


Yesterday I visited the Edinburgh College of Art sound library and borrowed a variety of CDs of relevant atmospheric drones and rich environments to use as a base for my soundtrack. I have also recorded my own sound effects, and will be combining all of these together to create an involving accompaniment to the animation.

Wednesday, 14 July 2010

Final Film in Progress

The final sequence is almost ready. I rendered it in stages as the various elements were added.

In this test, the seascape is building up from the wave effects shown in the last post, and the ship sets sail. The clouds were pulled into position but not fully animated, so they linger for a while and then suddenly vanish. This was the next task to animate, followed by Cranky's glorious debut.
I also added a title sequence, created using the 'poster' animation shown earlier in the blog, on Thursday 17th June. I added some animation to the poster elements at the end, making them gradually vanish and disintegrate. I also animated the construction of the scene, with the clouds rolling into frame, a spotlight around Mo's ship, the waves building up in layers and the background twisting into position, all ready for Captain Mo to set sail.


The second test piece includes the full Cranky sequence I created. Since all of Cranky's movements were already animated, I only had to drag the footage into position, and add an additional layer of waves to mask his entrance. I then began working on Cranky's lantern lure. To start, I had it bobbing in the middle of the ocean, and when Cranky surfaces I animated the lure layer to follow his movements. I used masks to animate the lure snapping in half and knocking the lantern into Cranky's mouth. At this stage, the lantern layer disappeared, since all of the lantern movement inside Cranky had been created in his own sequence. The next stage will be to add a cannon ball to hit the lure, and to continue the story, with Mo's ship being hooked down into the depths. The 'descent into the ocean' sequence can then be added, with Mo finally being drawn into the Underworld. Sorry, Mo.

Building Captain Mo's Adventure


The final sequence is underway!! It's exciting to see all of the individual ideas coming together. I started by building the seascape, using drawings and footage I filmed of rippling fabric. Here are two examples of the waves I created in this way:


The footage was placed on one layer, and the drawings were placed on the layer above and set to 'stencil alpha' mode. This meant that the silhouette of the image revealed the footage below, creating an effective wave design. I then animated the rotation and position of these waves for the final sequence.

Sunday, 11 July 2010

Cloud Formations Episode 2

I have now created 5 cloud compositions in the same way as the one below. I have combined them into one sequence to show the variations between them, and added a textural background. I will keep all 5 clouds as separate RGB+Alpha movie files, and add them into the final film when it is ready.


Cloud Formations


For the clouds in my sequence I was inspired by the devoré printing technique, which burns out one fibre in a blend to leave semi-transparent areas in a fabric. This allows a designer to reveal other patterns beneath devoréd areas when the fabric is layered up. This was an idea I wanted to re-create using Photoshop and After Effects, and this was my first experimental outcome:


  • This was created using photographs I took of some laser cut mountboard, with a spotlight placed behind to illuminate it. The laser cutting effect here was in fact a mistake- most areas did not cut through completely and the negative shapes wouldn't fall out. But this result creates a very beautiful effect when light is shone through the gaps. The design was also created by accident. The laser cutting programme, APS Ethos, stopped working before I had finished covering the whole page with clouds, and the programme continued to crash every time I tried to open it again. However, I think the sporadic design looks much better than an all-over design would have looked for this application.

  • I then inverted the image in Photoshop to create a more appropriate colour palette.


  • I cut out one cloud motif to animate, and created a separate version with only the cloud centres. I layered this on top of my original cloud in After Effects, and animated the position, rotation and opacity of the two layers together.

Cloud Layer


Cloud Interior Layer


Clouds Inverted layer

  • I added a final layer of inverted clouds, placed below the cloud interior layer, and animated the movement of this around the screen. Finally, I set the cloud interior layer mode to "Stencil Alpha," which revealed the layer below in only the cloud centre areas.

  • I created an RGB+Alpha movie of the composition, and imported this into a new After Effects project. I made the footage into a 3D layer, and was able to rotate the cloud inwards and outwards to give it more depth. Since I created the movie as RGB+Alpha, this meant that the cloud was the only item showing in the screen, with no background. I will now be able to create several clouds in this way, and finally add a suitable background to complete this element of my sequence.

Thursday, 8 July 2010

Descending to the Ocean Floor


The sequence showing Captain Mo's descent into the ocean is now almost finished. The only element missing is Captain Mo himself! He will probably be added right at the very end of the process, when all of the other sequences are ready, so that the ship can be animated in a continuous path through the film.

This descent to the ocean floor now includes:
  • Even more detritus. I added some additional laser cut shapes, a few elements taken from Cranky, and Cranky's head buried in the ocean floor. I used the original compositions I created of Cranky's two layers, and masked these off to bury him in the sand. I used a variety of filters to make these elements blend into the background.
  • 'Underworld' sign. I created this image in Photoshop, and added a separate layer of lights. I animated the opacity of these lights to give the suggestion of them gently illuminating and fading. The arm holding the sign was original drawn as a potential limb for Cranky, but I later decided he was better off without. I placed an anchor point at the elbow joint to create a rotational movement.
  • A little fishy. I took a drawing of a fish and animated his movement through Cranky's eyehole. This required two overlapping layers of the fish, one above Cranky and one below, and masking these off to hide the appropriate areas of the layers as he moved across.
  • The Underworld! I decided that I wanted the Underworld to look like a diver's helmet, which has been neglected at the bottom of the ocean for a long long time. I thought this would relate well to my steampunk references, and would enable me to use some beautiful metallic textures taken from photographs I took in the National Railway museum, and some rocky, distressed surfaces from photos at the beach. I drew an inky outline then filled the shapes with textures in Photoshop and kept building these up. Finally, I added a plume of smoke and an ominous red interior. I added the window layer separately and made this 3D, so that I could rotate it inwards on its z axis.
The only other elements I am considering adding are some illuminating fish in the darkness, but I will decide this after Mo has taken his rightful place in the sequence.


The Underworld original drawing


The Underworld with texture

Descending

This is a work in progress. The sequence I am currently animating is a descent into the ocean, when Captain Mo is being dragged down to the watery depths. I am slowly building all of the elements I need into the sequence, and this footage shows the composition at its current stage.

So far, the sequence features:
  • A watery backdrop. This a video I took of some layered fabric, which I attached to a window blind and gradually drew upwards whilst gently rippling it to give the swaying effect. I used adjustment layers to alter the brightness and contrast, and the hue.
  • Piles of detritus at the sides, which I will continue building up. On the left is a texture taken from a photograph to create a rocky edge, as if Mo is falling into an underwater cavern. I will add a similar shape on the right. I used a 'Hard Light' filter to blend it into the background. The shapes on the right include scans of my laser cut samples, such as a lamp and some cogs, and the negative shapes from my finished pieces. I also added a composition featuring a sketch of another mechanical beast, perhaps an earlier model of Cranky. I animated it in a similar manner, with a moving jaw and rotating gills and eye. The bottom of the cavern was created using a bubble texture from a photograph taken at the beach.
  • A squid drifting past. I took an inky drawing of a squid and added a "multiply" filter to make it look more at home in the water.
  • An ominous darkness. This was created using a solid black layer, to which I added a rectangular mask with feathered edges. I then moved this whole layer upwards to create an ascending darkness. Watching it back in Quicktime, I now realize I need to adjust the timing of this layer to make the animation run more smoothly. The footage of the fabric ends before that the darkness has covered the screen, so I will need to alter this.
  • Cranky's lure. I used the same spotlight effects as I used when Cranky swallowed the lantern to illuminate the darkness. I will add other broken elements of Cranky, such as his gears and sparking battery and his head at the bottom of the ocean.

When we reach the ocean floor, the video continues to run with very little action. This is because there are several more elements to be added before the sequence is finished.


The next stage will be to finish building up all of the layers of detritus and broken Cranky bits, and to create the Gates of the Underworld on the ocean floor. Finally, Mo's ship will be added.

Sorry Captain Mo - keep fighting against your Fate, and one day you may reach new seas.

Tuesday, 6 July 2010

Cranky in 60 Seconds

Cranky has finally got some movement. This sequence shows his entire screen time, from his dramatic entrance to sinking in defeat. The lantern will be knocked into his mouth in a different composition. I also added some smoke effects, which I created using a texture from a weatherworn stone floor and trimmed into a billowing shape. I animated the opacity and the scale, and also added a ripple effect.
Originally I had intended to show some little critters working away inside Cranky, but with all of the other elements combined I now think that this would be too much detail on screen at once. I have added the concept drawings to the end of this post, to show the original ideas, but have now decided to omit these characters from my final sequence.

Cranky appears 5 seconds into the sequence.


Monday, 5 July 2010

Cranky Sees the Light, Episode 2

Today I edited the layers in my previous film, adding some extra motion for the inner workings and developing the spotlight techniques. I decided to use two lights- one with a very focused beam to represent the glow from a lantern, and another with a larger, softer beam to reveal more of the inside of Cranky. I also added a lantern, and some gills. The end of the sequence runs for several extra seconds, since the next stage will be to animate his movement (and his gradual sink to the depths of the sea in defeat.) I will also create a sequence to go before this one, showing the lantern being knocked into Cranky's open jaws.

The elements I used to create this sequence were:
  • A scanned fabric printed with gold foil to create Cranky's surface.
  • A scan of the mountboard I laser cut with Cranky's workings, placed with the reverse side on the scanner bed. I liked the burned edges of the cut, and thought the colours were very appropriate for my Steampunk references.
  • A scan of the second layer of laser cut mountboard, again showing the burned edge. This time I used Photoshop to invert the image, creating an effective contrast in colour to the layer below.
  • A lantern drawing from my sketchbook, which I altered in After Effects to increase the contrast and lower the brightness.
  • Some footage of fire I filmed on my digital camera. I masked off the area I wanted and adjusted the scale to suggest growing flames. I also used a "Hard Mix" filter to blend it into the other layers.
  • Two spotlights- one with a narrow beam, high intensity and sharp edge, and the other with a lower intensity, wider beam and softer focus.
  • An Art Deco-inspired drawing which I duplicated and fanned to create gills. I placed anchor points at the base of the fan, and rotated the individual drawings to create the movement.


Cranky top layer - Scanned fabric
Cranky middle layer - laser cut mountboard (inverted)

Cranky base layer - laser cut mountboard

Lantern and gill drawings